Network
The Network page (sidebar → Network) lists each interface in a table network that NetEdge has detected on the host and lets you configure how Launch each one for the clients—DHCP and PXE/iPXE—either by interface or from a shared global template.
Interface Table
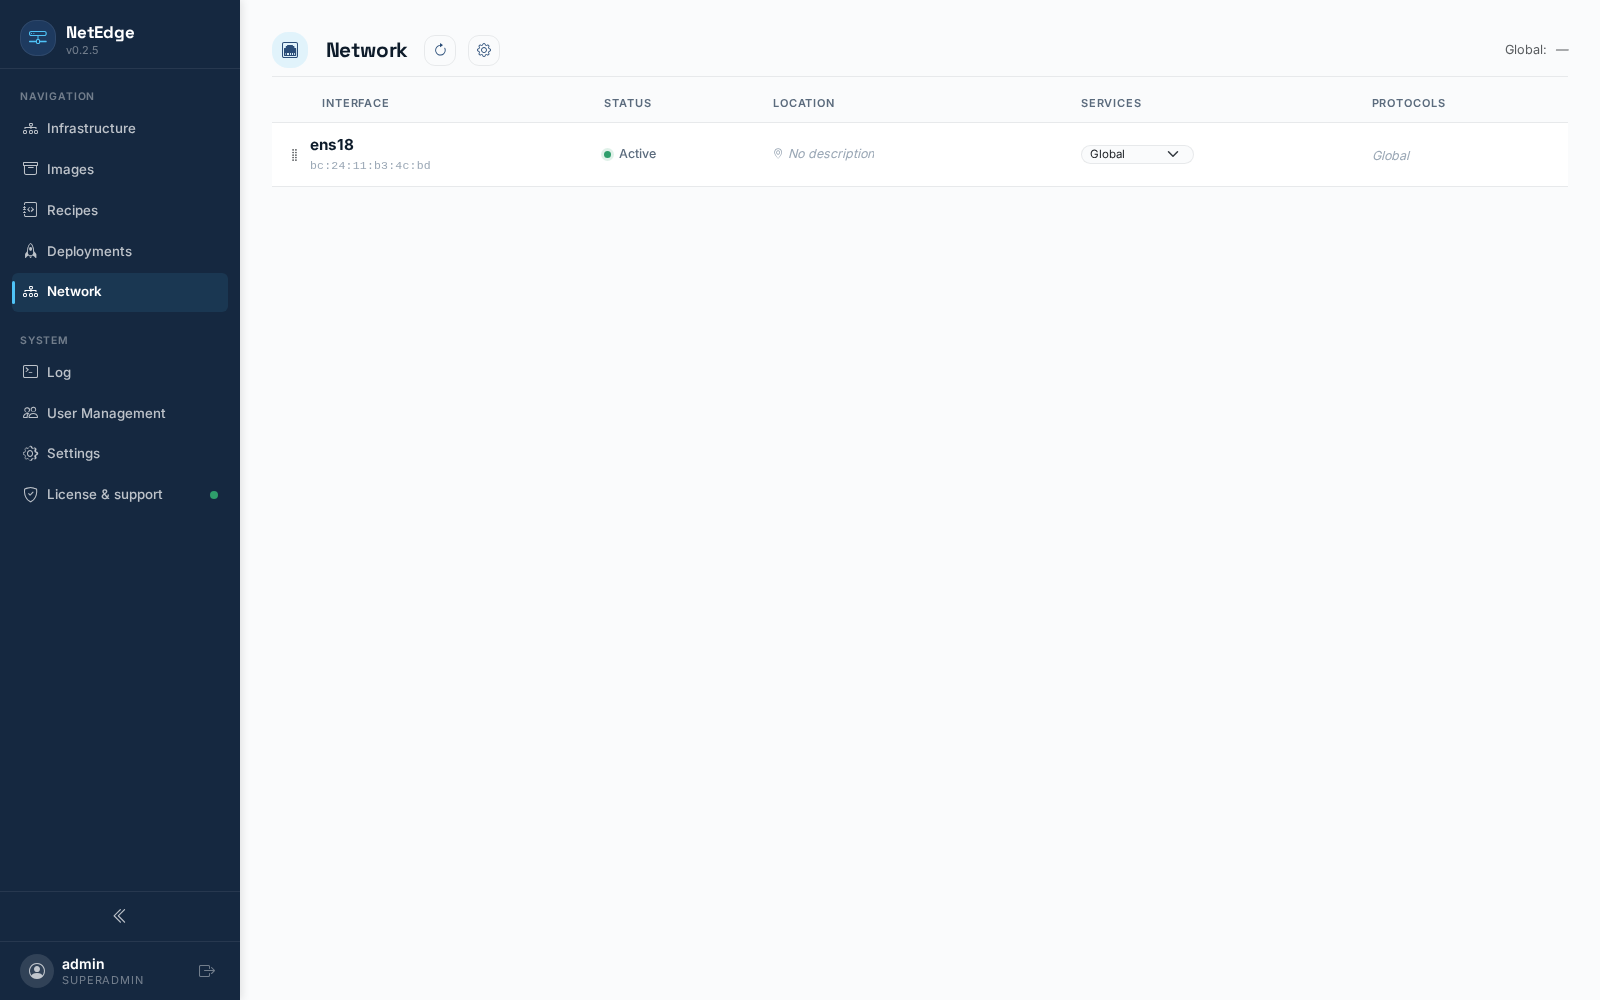
Each interface occupies a row with the following columns:
- Interface — interface name and MAC address. The rows are You can reorder them by dragging them using the handle icon on the left; The order is preserved between sessions.
- Status — a connection point (connection detected / no connection), the detected IP address (or the full CIDR when the subnet is known) and a small indicator that alerts you if another server has been detected DHCP/PXE responding on the same subnet, with a button to return to check it.
- Location — a free-form description field that can be edited online by by hovering your mouse over the row and clicking the pencil icon that appears — Useful for labeling interfaces by classroom, rack, or switch when a The server has several NICs.
- Services — a three-state selector that serves as the master control for if any network service is running on that interface at all (see the following section). Disabling it turns off DHCP and the PXE for that interface, regardless of its individual settings.
- Protocols — one badge for each active protocol on the interface (DHCP, PXE, iPXE…) and the gear icon that opens the settings for that particular interface.
There are two buttons at the top of the page: a refresh icon to "Rescan for interfaces," and a gear icon that opens the global network configuration — the shared template described above below.
Global Settings vs. Per-Interface Settings
This is the only thing you need to understand before playing either of them modes: all services that can be run via an interface (DHCP, PXE…) are configured using the same three-state selector — the same one that In the Services column of the table, you'll see:
| Status | Meaning |
|---|---|
| Global (inherited) | This interface uses whatever is set in the global configuration. |
| Disabled | The service is disabled on this interface, regardless of what the global template says. |
| Enabled | The service runs on this interface with its own configuration under the switch, ignoring the global template. |
New interfaces always start in the Global state. This allows you to set reasonable default values once (in the global modal) and so that all interfaces automatically follow them, while still being able to make a one-time exception for a specific interface (a DHCP range different for the NIC of a second classroom, for example) without changing anything else.
The global settings modal (gear icon in the header of the page) and the interface modal (gear icon in the column (Protocols for each row) display exactly the same tabs and fields—the difference It's just a matter of what they apply to: an interface, or the template that each one inherits from interface in "Global" state.
DHCP
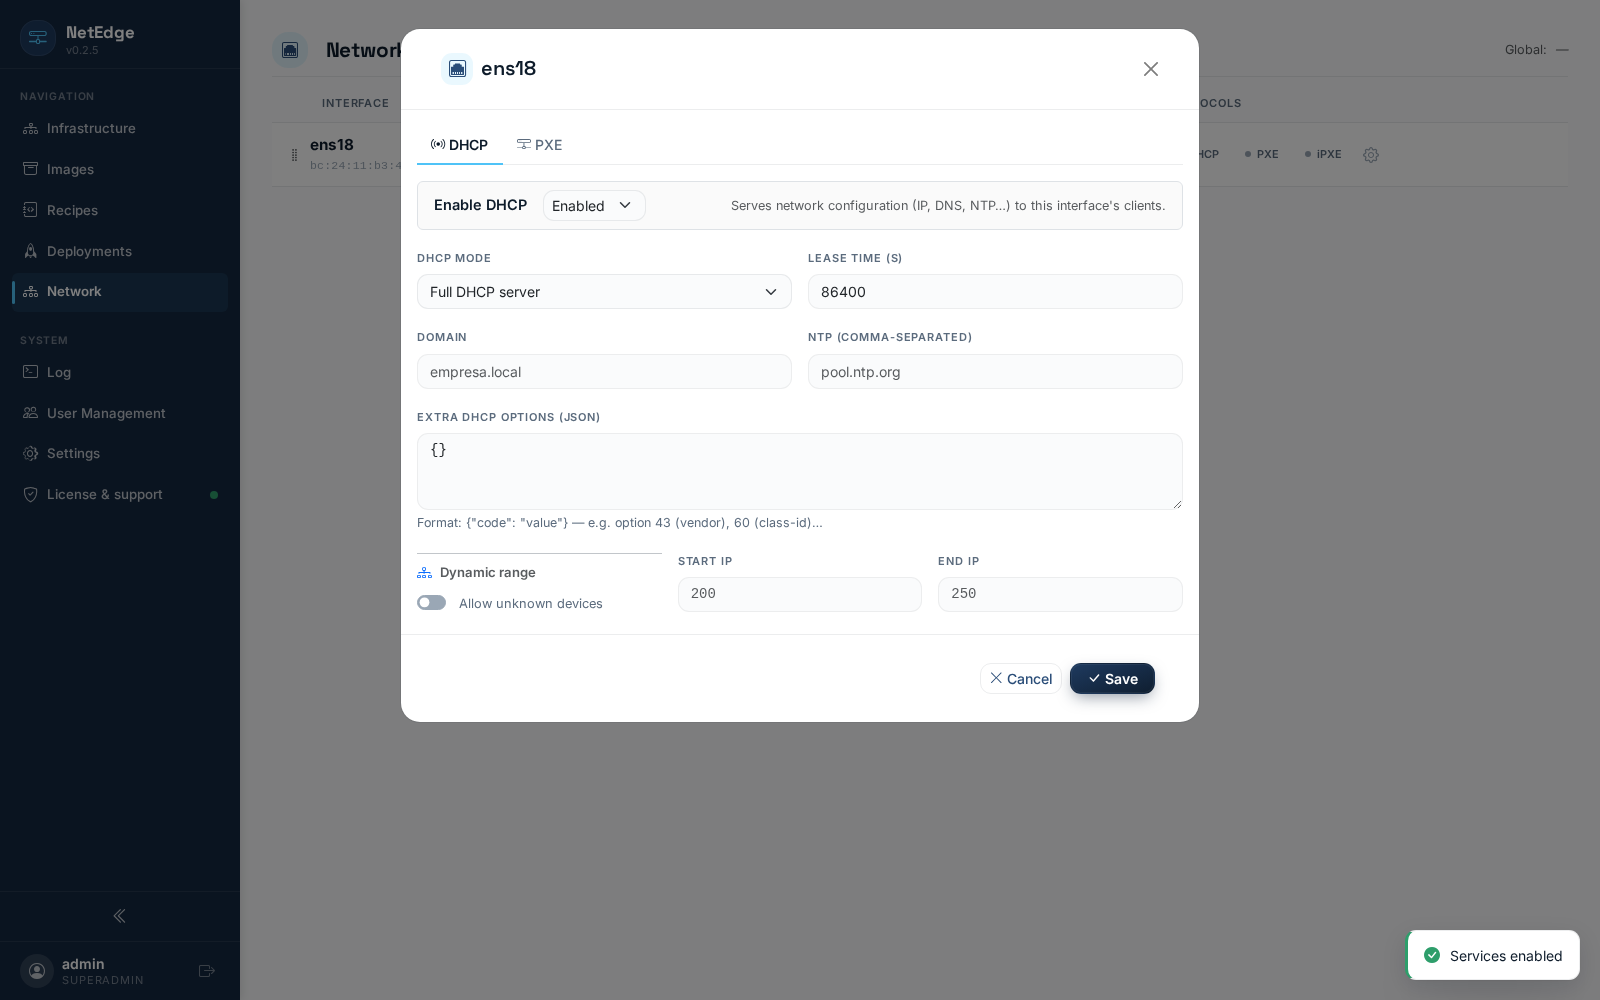
- Enable DHCP — master switch for this tab (three states) in the modal via the interface, as shown above).
- DHCP Mode — Proxy PXE (recommended: NetEdge responds only to specific PXE options, coexisting with an existing DHCP server on the network) or Full DHCP Server (NetEdge assigns the addresses (IP itself).
- Concession Term(s), Domain, NTP (address of the (DHCP server assigned to clients).
- Allow unknown MACs — if clients with NetEdge have not yet know whether or not they receive an address.
- Dynamic Range (server mode only) — Start/end IP addresses of the pool which distributes NetEdge.
- Additional DHCP Options (JSON) — Raw vendor/class DHCP options for advanced settings.
PXE
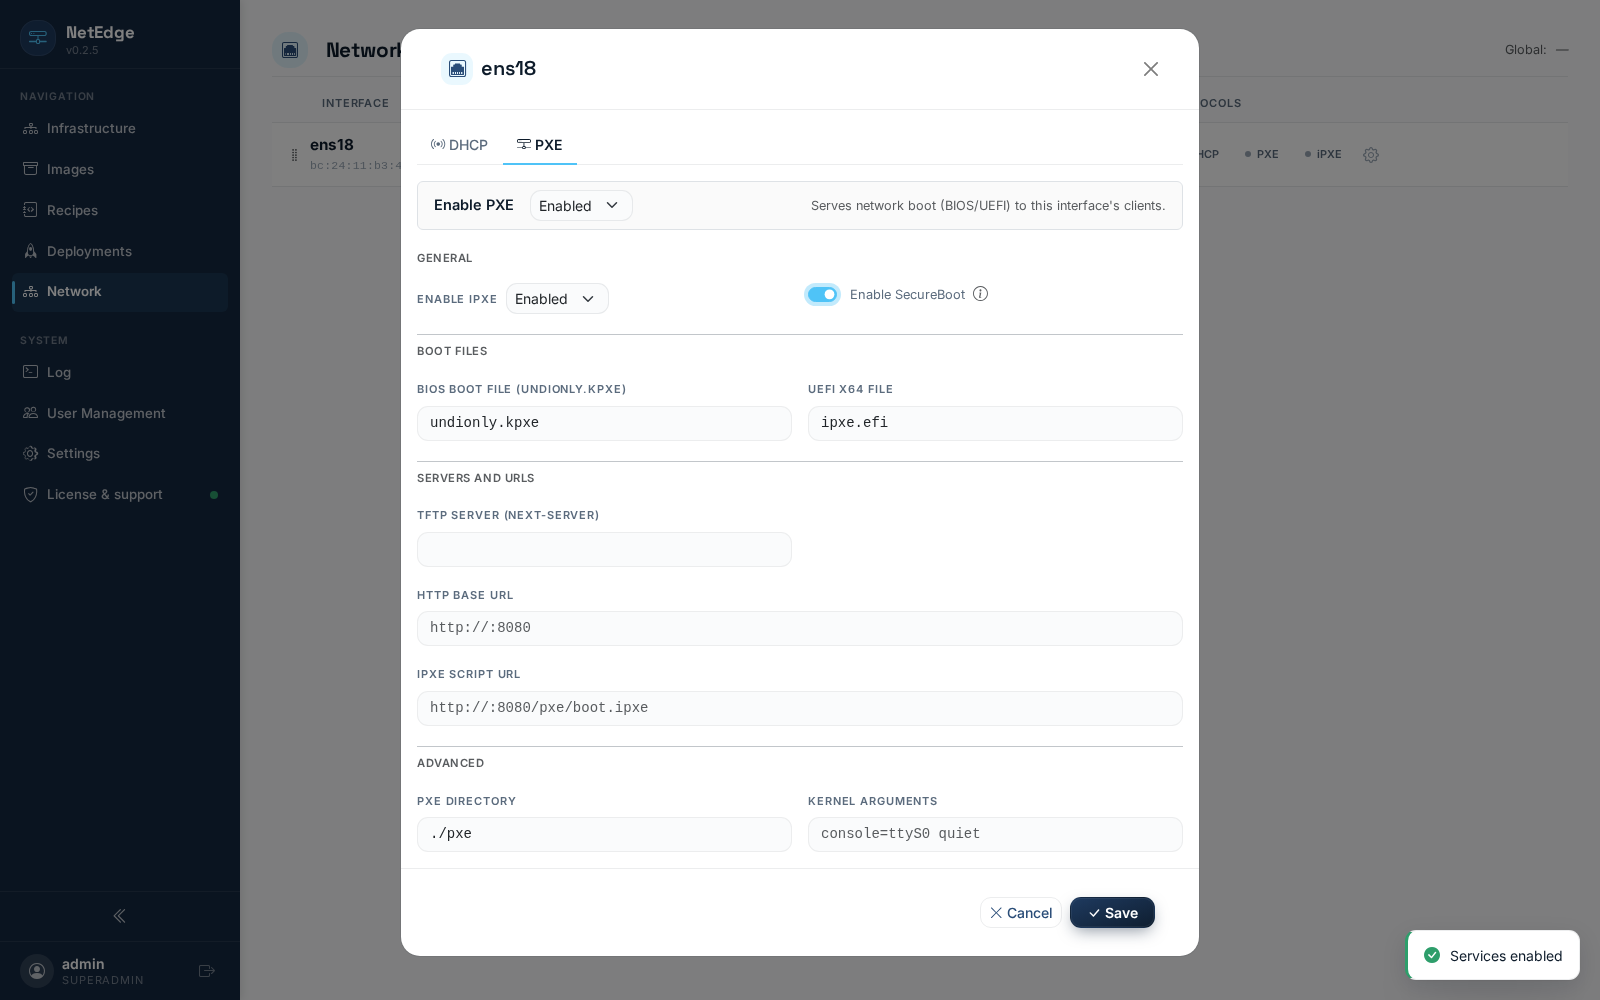
- Enable PXE — master switch for BIOS network boot classic.
- Enable iPXE — defaults to PXE; enables iPXE chainloading and the URL of your script.
- Enable SecureBoot — serves the signed chain shim→GRUB→kernel to the UEFI x64 clients so they can boot with Secure Boot enabled, without change the BIOS settings.
- Boot Files — the BIOS boot file (e.g.,
undionly.kpxe) and the UEFI x64 file (e.g.,ipxe.efi, relevant only (with iPXE enabled). - Servers and URLs — the address of the TFTP next-server, the HTTP URL the platform from which customers obtain resources, and the URL of the iPXE boot script.
- Advanced — the resource directory PXE on disk and any extra kernel command-line argument passed to all clients who start up through this interface.
How does this fit in?
The first step is to ensure that DHCP and PXE are properly configured on an interface practical aspect of any deployment — see First Deployment for a path that forms a network, creates a recipe, and adds nodes to from beginning to end.